Wednesday, August 6, 2014

Green Swiss Chard tart (with a surprise)

I suppose any green will work, really, but I really loved it with Swiss Chard. I like the consistency of this green (it stands up well to the wilting), and the flavor.

Ingredients:
1 bunch of swiss chard
1 red pepper
1 orange pepper
1 onion (I used purple for color, but Spanish is fine too)
a bit of olive oil
3 eggs
about 3/4 cup bread crumbs
about 1/2 grated parmesan
salt and pepper to taste

Directions:

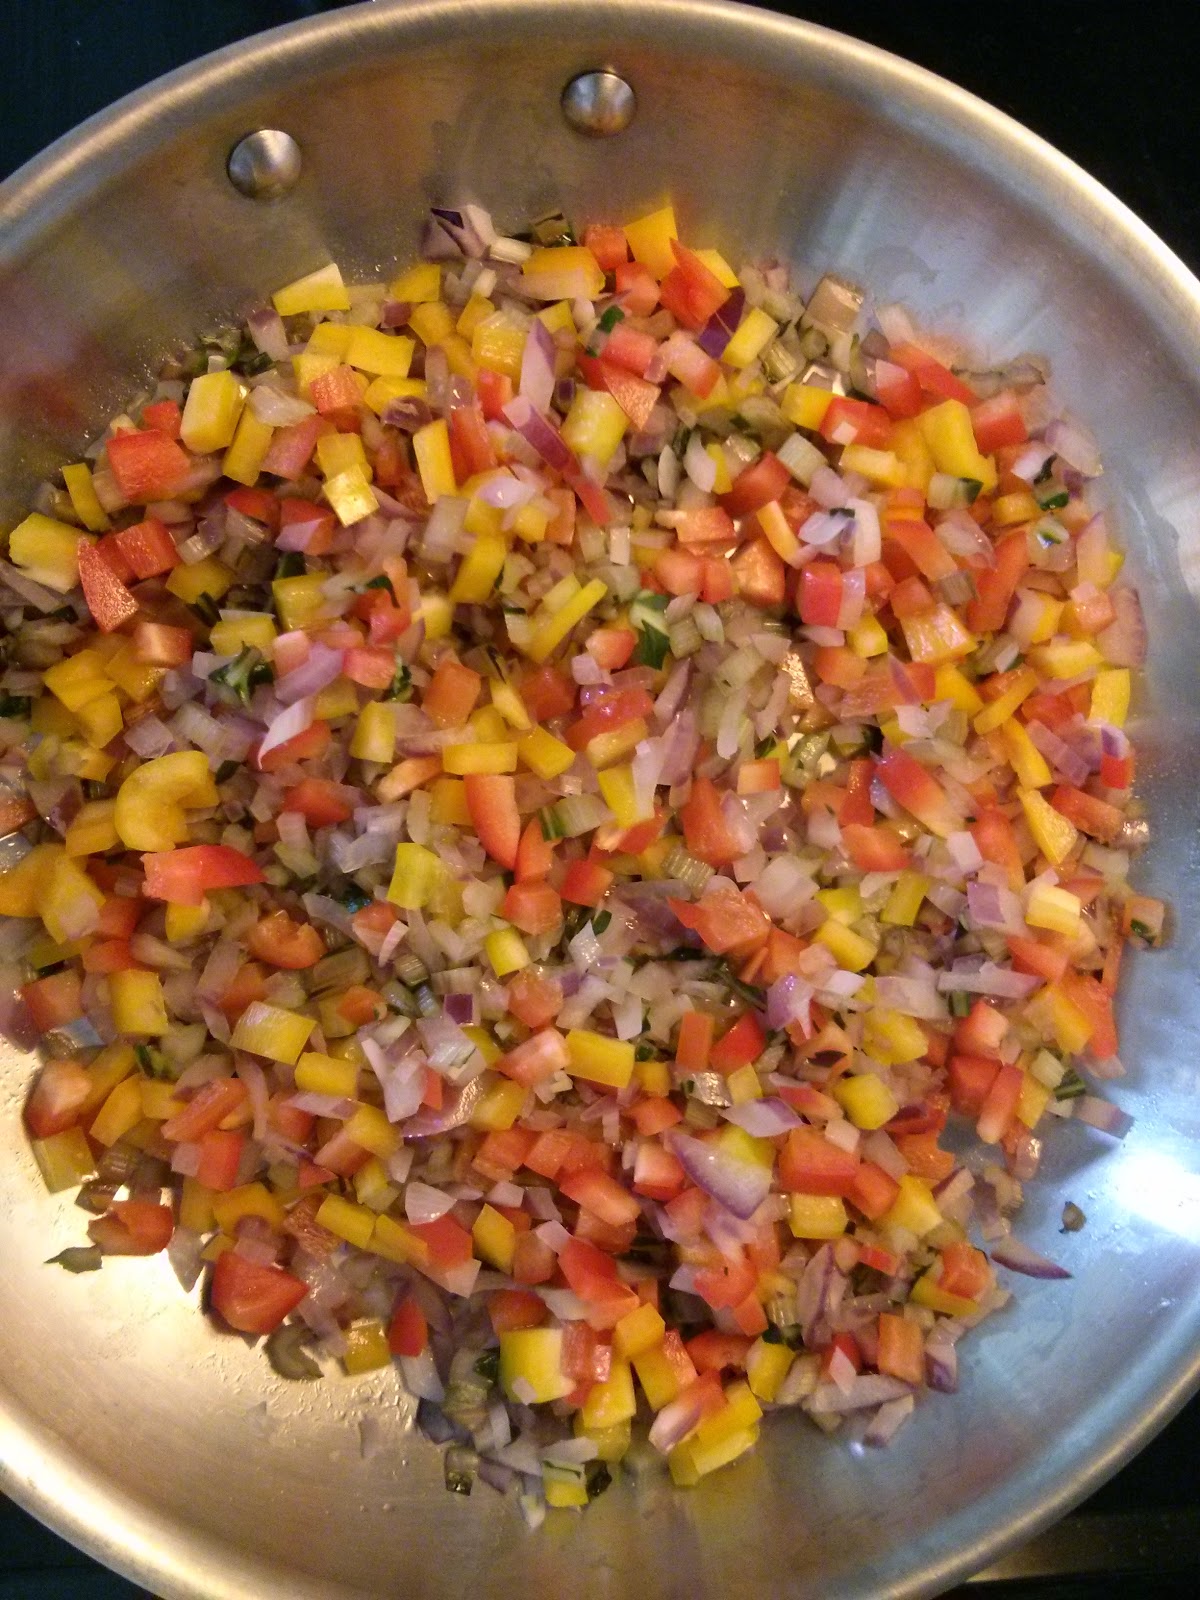
1) Dice the onion and peppers
2) Wash the swiss chard. Remove the ribs. For the ribs are good, slice them up into small pieces. The ones that aren't, discard. Obviously what 'good' means is up to each cook. Then roughly chop up the swiss chard leaves.
At the end of what may feel like 16 hours of slicing and chopping, you should have the following ready to go. From here on out it's easy.

3) Heat up a pan with some olive oil and sauté the onions.


4) Add the swiss chard stems


5) Add the peppers. I didn't ended up using the entire 2 peppers. It seemed like too much. I'll be using the left over peppers for a salad in the next day or two. Isn't it beautiful? I love the colors.


6) Add the greens, a bit at a time. They won't all fit at once, so add a bit, allow it to wilt, and then add some more.


Once all the greens have been added, you'll have a beautiful swiss chard mixture:


7) Turn off flame. Place the pan at an angle and move the greens to one side. This will allow the liquids to separate from the greens. This is important so that you won't have a soggy pie. Skip this step if you like soggy pies.


Surprise! (yes, this is the surprise from the title of this recipe) You just made a delicious vegetable stock. Save the juice! Don't throw it away! I have mine in the fridge and will use it to make quinoa or some other grain in the next couple days.

Allow this to drain and cool for a bit, maybe 20 minutes or so. Then take the greens and place them in a medium sized bowl. Place in the refrigerator to allow it to cool.

8) Meanwhile, and I forgot to take pictures here so excuse me, crack open those three beautiful eggs you've picked out and mix 'em up. Add 3 tablespoons of parmesan. Add salt and pepper to taste. I only added pepper - I figured the cheese would be salt enough.

Heat the oven to 350 F / 176 C

9) Remove the now chilled mixture from the refrigerator and mix in the eggs. This is why we chilled the mixture - we don't want the eggs to cook when we mix them in.

10) Take a round 9 inch baking dish and cover the bottom with oil or cooking spray or whatever tickles your fancy. I used olive oil. Add 1/2 cup breadcrumbs to the bottom and swish it around so that it's evenly coated. I also swished it around on the sides a bit so that there was something covering the sides.

11) Gently add the swiss chard mixture.


Then add some parmesan and breadcrumbs on top.

12) Place in the oven for 30-40 minutes. I checked at around 30 minutes to see how it was coming along and decided to add 10 minutes, so I did cook mine for the full 40 minutes. 
When done cooking, take out of the oven and allow it to cool for a bit:


13) Enjoy!


Friday, June 13, 2014

Egg Avocado Pillow

This is a great one for breakfast or lunch. I usually have it for lunch because I think it's a bit much for breakfast. I digress...

There are three steps to putting this beauty together. I'm excited to share the second step because it's a modification that I make on an egg classic that I haven't seen before and that I think works spectacularly well.

Step 1 - Bread prep

Toast a couple slices of bread.
Once they're toasted allow them to cool


Step 2 - Avocado prep

Ingredients
1 avocado
fresh squeezed juice from 1/2 large lemon or 1 small lemon
salt
pepper
cayenne or hot paprika (optional)

Directions
1) peel avocado, place in a bowl, and mash
2) add lemon juice and mix
3) add salt, pepper, and cayenne or paprika and mix


Step 3 - Egg prep
I use three items for this step - 2 eggs and a pan.

Directions
Place eggs on pan as if frying an egg

Notice that for the white of the egg, there are essentially two layers (seen above). Don't worry, allow it to cook for a few minutes, until the bottom is cooked. Then, carefully flip the egg over. What will happen is that layer that's on top, that didn't cook, will envelop the yolk, and you'll have an egg white/yolk sandwich. Continue to cook as much or as little as you like, depending on how runny you like your yolk.


Last step here is to put all three pieces together!

You can even see in the picture on the right the yolk sandwiched in. If you give it a try please let me know what you think! xo

Another version of Hidden Greens salad!

I've been making this salad a lot lately, and I recently made a version with a few different vegetables that I think turned out really well!

The ingredients in blue are ones I added. I removed bok choy and changed the quinoa quantity. The dressing stayed the same, as did the steps. I copied them here just for convenience sake.

Ingredients:
3 tomatoes  (I used vine tomatoes)
1 cucumber 
1 red pepper
1 orange pepper --- adds some nice color! 
1 box of pea shoots!
celery! As much as you like. I love celery so I added a generous quantity
1 can garbanzo beans, rinsed 
1/2 cup quinoa
some feta cheese 

 for dressing: 
1 tablespoon red vinegar 
1 tablespoon fresh lemon juice 
4 tablespoons EVOO 
2 tablespoons greek yogurt 
salt to taste 
pepper to taste 
cumin to taste 
honey to taste 

Directions: 

1) Put quinoa to cook. Once finished cooking set aside to cool. I spread it out over a large plate to help it cool faster. 

2) Chop tomatoes, cucumber, and red pepper and orange pepper as small as you like. Place in your salad bowl.

3) The hidden greens! Chop the pea shoots finely, add to the salad bowl and mix in. Will give a nice crunchy texture!

4) Open garbanzo beans and rinse thoroughly. Add to salad. Mix. 

5) Add feta cheese and at least somewhat cooled quinoa. Mix. 

6) Whisk all dressing ingredients together except honey. Once well mixed, add honey. 

7) Add dressing to salad. 

8) Place in refrigerator for a little bit, at least 15 minutes, and enjoy! 

 If you made this please let me know what you think. xoxoxo

here's an image of the salad before the dressing:


here's an image of the salad dressing:

and here's a picture of the final product! Yum!


Monday, June 9, 2014

Stock + Veggies + Grain + Spices

The best way to make this an easy recipe is to have things prepared beforehand. If you pick a day to chop and prep, it's fast, nutritious, and delicious!

The recipe name says it all - combining those ingredients is a surefire way to make a one pot wonder.

If you like it the first time around, you're likely to make it again. I have several times. But depending on the season, the vegetables in your refrigerator, and whatever spice mood you're in, it's unlikely (unless you pay particular attention) that you'll make the exact same thing twice.

Ingredients:
Approximately 2 cups chicken broth or stock
I make chicken stock or broth (not the same thing) in bathes and store it in the freezer in about 2 couple containers.
For my chicken stock or broth recipe click here 
Approximately two cups of a variety of chopped up vegetables.
A half cup of a grain, such as quinoa, bulgar, some sort of rice, wheat berries, farro
A combination of spices
A suggestion that I thought worked well: salt, pepper, turmeric, cumin, and cardamon (more cardamon than the others - gives it a somewhat lemony taste)

Directions:
1) In a pot (I used a 3.5 quart pot) add some broth or stock to cover the bottom, a centimeter or so. If the broth/stock is frozen, like it was when I made it last night, place the frozen block in the pot, turn on the stovetop, allow some of it to melt, and then place the remaining frozen block in a bowl off to the side.
2) Add your fruits/vegetables and allow them to cook a bit.
Last night I used the following: tomatoes, red pepper, carrots, green onion, bok choy.
3) Return the block of frozen stock to the pot, so that it now sits on top of the vegetables. Allow the broth/stock to melt and the vegetables to cook, until the harder pieces, such as the carrots, are softened.
4) Add a half cup of whichever grain you choose. Make sure there's enough broth/stock to allow the grain to cook. If there isn't, add more broth/stock or water.
With this recipe, if you add more liquid, you can turn what you're making into soup.
5) Add in your spices. Taste as you go. You can add more of a spice as you go... not so easy to remove it once it's in there.

If you like, add some shredded parmesan or asiago cheese to the top when serving. This adds a nice touch.

I again forgot to take a picture of the final result, but I did take this picture while I was cooking (step 3)

Please let me know what you think! xo


Friday, June 6, 2014

Grilled Zucchini and Butternut Squash party

This was down and dirty. And easy and fun. Let's jump in ;b

Ingredients:
- Butternut Squash, cut into cubes 
(I bought some that were already cut up, washed them, and cut them into smaller sized pieces)
- Baby zucchini, cut into small pieces
(although I imagine big zucchini works too. This is the one I found and it was cute and delicious)

Olive oil
Balsamic vinegar
salt
pepper
cumin
cayenne pepper
turmeric

Directions:
1) Preheat oven to 375 F
2) Place your diced up squash and zucchini in a bowl. Pour in some olive oil and balsamic vinegar - enough to coat and flavor, not enough to drown. 
3)  Add the spices and mix it up. To do this, I don't use any utensils, I just stand with the bowl over the sink and toss the ingredients around until everything is coated. It's efficient and entertaining, all rolled into one.
4) Place the ingredients on a cookie sheet. 
I use this one that I bought from Williams-Sonoma years ago. I looked it up to share it with you and am shocked that I paid that much for it, but now that I regularly grill vegetables, I think it's worth it. I don't have to put down any paper, and it washes incredible easily. During the cold weather, especially, grilling vegetables is a quick and tasty way to supplement or make meals.
5) Set the timer for 20 minutes. After about 5 minutes yummy smells should start to fill the kitchen.

I forgot to take a picture last night! But I will make this again and then add the picture.

Please let me know what you think! xo

And here are the pictures!
Here are the veggies, chopped and tossed:

Then I add them to the baking sheet: (look at that beautiful purple carrot with an orange interior!)

And here they are, after roasting: Yum yum yum 


Wednesday, June 4, 2014

Hidden Greens Summer Salad!

Yesterday I made a salad that turned out so yummy! It was so delicious that I had a couple servings. Or three... 

It took about 30 minutes to make, mostly because of the chopping.

If you want to plan ahead, you can do all the chopping for a few days worth of recipes on one day, save it in the fridge, and then just throw everything you need for that recipe on the scheduled day. I do this from time to time and it's a great time saver!

Ingredients: 

for salad: 
2 tomatoes (I used this one from Trader Joe's, tomato on the vine)  
1 cucumber (I used Trader Joe's organic english hothouse cucumber)
1 red pepper 
1 head bok choy (or some other green such as spinach or kale)
1 can garbanzo beans, rinsed 
3/4 to 1 cup quinoa, depending on how much you'd like to add to the salad, cooked 
some feta cheese 

 for dressing: 
1 tablespoon red vinegar 
1 tablespoon fresh lemon juice 
4 tablespoons EVOO 
2 tablespoons greek yogurt 
salt to taste 
pepper to taste 
cumin to taste 
honey to taste 

Directions: 

1) Put quinoa to cook. Once finished cooking set aside to cool. I spread it out over a large plate to help it cool faster. 

2) Chop tomatoes, cucumber, and red pepper as small as you like. Place in your salad bowl.

3) The hidden greens! Chop the bok choy finely, add to the salad bowl and mix in. Bok choy definitely gives it a certain flavor. As will kale. Spinach should be able to hide in pretty well if you want to avoid the greens flavor altogether.

4) Open garbanzo beans and rinse thoroughly. Add to salad. Mix. 
Note: I didn't add all the garbanzo beans because I thought it would be too much. I added probably 2/3. 

5) Add feta cheese and at least somewhat cooled quinoa. Mix. 

6) Whisk all dressing ingredients together except honey. Once well mixed, add honey. 

7) Add dressing to salad. 

8) Place in refrigerator for a little bit, at least 15 minutes, and enjoy! 

 If you made this please let me know what you think. xoxoxo